A Step-by-Step Guide to Aligning Audio and Video in CapCut
Ever watched a video where the words don’t match the lips? Frustrating, right? Perfect audio-video sync makes or breaks content. It’s not just technical stuff. It’s about respecting your viewers.
When your audio lags, viewers check out mentally. They might not even finish watching. But well-synced content? It pulls people in. Keeps them engaged. Makes them want more.
Let’s dive into making this happen with video editing software that won’t let you down.
Why Audio-Video Sync Matters More Than You Think
Think sync is just a technical detail? Think again. It’s the invisible foundation of quality content
When words match movements, magic happens. Viewers forget they’re watching edited content. They immerse completely in your story. This isn’t just nice-to-have. It’s essential.
Professional creators know this secret. Proper sync elevates amateur footage to professional quality. It makes educational content clearer. It makes emotional moments hit harder.
Ever noticed how top creators never have sync issues? That’s no accident. They prioritize this fundamental aspect. You should too.
Getting Started with CapCut Desktop Video Editor
First things first. Let’s get the right tools. CapCut Desktop Video Editor packs powerful features into an intuitive interface.
Head to the official CapCut website. Look for the download button. Click it. Save the file. Then open it. Follow the installation prompts. They’re straightforward.
Remember, while many features are built-in, some premium tools require investment. Consider it an investment in your content’s quality. Professional results require professional tools.
After installation, take a quick tour. Familiarize yourself with the layout. The clean interface welcomes both beginners and pros. You’ll feel at home quickly.
Bringing Your Files into CapCut
Got your video and audio ready? Great. Let’s bring them into CapCut.
Open the program. Click “Import” in the top menu. Browse to find your files. Select them. Click “Open.” Simple as that.
Your files now appear in the media panel. Take a moment to organize them. Rename if needed. Group similar assets. Good organization saves time later.
Now, drag your video to the timeline. It appears as a visual track. Next, drag your audio file below it. You now have separate video and audio tracks. This gives you maximum control.
Mastering Manual Sync in CapCut
Manual sync sounds intimidating. It’s actually quite intuitive. Let’s break it down.
First, find a clear reference point. A clap, a door closing, or lips forming a hard consonant. These make perfect sync points.
Zoom in on your timeline. Really zoom in. Precision matters here. Use the mouse wheel or the zoom controls at the bottom of the timeline.
Now, drag your audio track left or right. Line up that reference point in both audio and video. Play it back. Not quite right? Make tiny adjustments. Repeat until perfect.
For speech, focus on plosive sounds like “p” and “b.” These create visible lip movements and clear audio spikes. They’re your best friends for precise syncing.
Trust your ears and eyes together. If it looks and sounds right, it probably is. Don’t overthink it.
Leveraging CapCut’s Smart Features
CapCut comes packed with intelligent tools to enhance your workflow.
The audio waveform display visually represents sound. Larger peaks mean louder sounds. Use these visual cues to match audio events with video actions.
Markers are your friends. Add them at important sync points. They create visual references on your timeline. Use them generously.
Split tools help isolate sections needing adjustment. Cut your timeline at problematic areas. Then adjust those specific sections without affecting the rest.
Remember to save versions as you work. Nothing’s worse than losing perfect sync because you can’t undo enough steps.
Enhancing Your Project with Advanced Tools
Once your sync is solid, elevate your project with specialized tools.
The video background remover creates professional-looking effects. Remove distracting backgrounds. Focus viewer attention exactly where you want it.
Create custom transitions between scenes. These maintain viewer engagement during scene changes. They also help disguise any remaining minor sync issues.
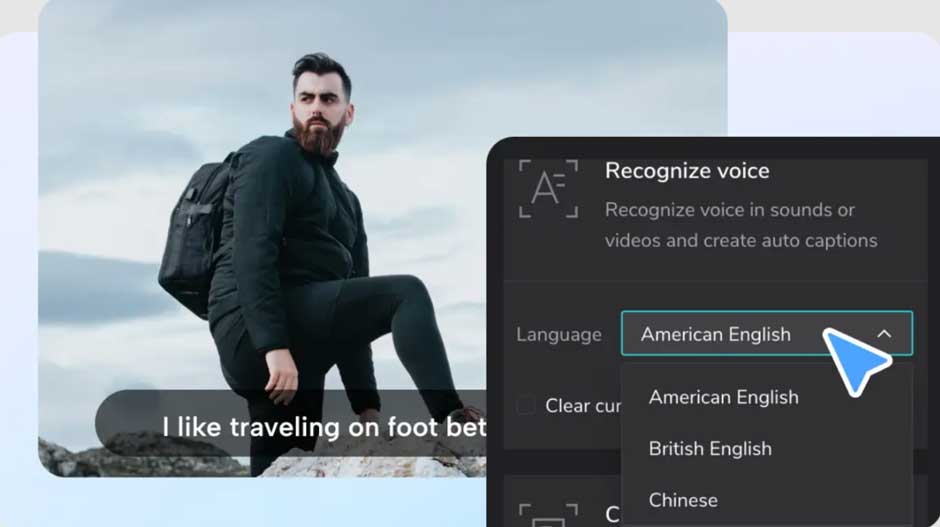
Add text overlays to emphasize key points. Captions help viewers follow along, even with audio off. They’re especially valuable for educational content.
Adjust audio levels throughout your project. Ensure speech is clear and background music supportive, not distracting. Perfect audio balance complements your sync work.
Fine-Tuning for Professional Results
Nearly finished? Time for final polish.
Watch your entire project from start to finish. Take notes on any sections that still feel off. Mark timecodes for easy reference when you make adjustments.
Check your work on different devices. Sometimes sync issues only appear on certain screens or speakers. Fix these before publishing.
If something feels off but you can’t identify it, trust that instinct. Keep adjusting until it feels right. Even milliseconds matter here.
Consider asking a friend for feedback. Fresh eyes often catch things we miss after hours of editing.
Exporting Your Perfectly Synced Creation
You’ve done the hard work. Now share it with the world.
Click “Export” in the top right corner. Name your project something meaningful. Choose appropriate resolution settings. 1080p works well for most platforms.
Select a frame rate matching your original footage. This maintains smooth motion. Pick MP4 format for maximum compatibility across platforms.
Adjust quality settings based on your needs. Higher quality means larger files. Find the balance that works for your content and platform.
The export process takes time. Use this moment to plan your next project. Or simply relax. You’ve earned it.
Beyond Basic Sync: Next-Level Techniques
Ready to level up? Try these advanced approaches.
Work with compound clips. Group synced sections together. This protects them from accidental adjustments while you work on other areas.
Use ducking for voiceovers. This automatically lowers background music when someone speaks. It creates professional-sounding audio with minimal effort.
Consider J and L cuts. These advanced editing techniques let audio transition before or after video cuts. They create natural-feeling scene transitions.
Remember, mastering these techniques takes practice. But the results are worth it. Your content will stand out from the crowd.
Wrapping Up: Your Path to Sync Perfection
Audio-video sync might seem technical. It’s actually an art form. It requires both precision and feeling.
CapCut Desktop Video Editor provides the tools you need. The rest comes from your attention to detail. And your commitment to quality.
Remember why you’re doing this. Proper sync shows respect for your audience. It demonstrates professionalism. It allows your content to shine on its own merits.
Keep practicing these techniques. They become second nature with time. Soon, perfect sync will be your signature. Your viewers will notice. Even if they don’t know exactly why your content feels so polished.
That’s the mark of true quality. When excellence becomes invisible. When viewers focus entirely on your message. Not on technical distractions.
Now go create something amazing. Your perfectly synced content awaits.