How to Screen Record on Windows 10 & 11 with Audio Using iTop Screen Recorder?
Are you a Tech YouTuber, Streamer, or Windows user wanting to record your screen effectively? Whether you are producing tutorials, gameplay, or any presentations, a dependable screen recording is beneficial.
This instruction will help you understand how to record the screen of a Windows 10 & 11 device with sound with iTop Screen Recorder. It is highly effective and yet incredibly simple to use powerful software. It is flexible to accommodate all your recording requirements.
The Rise of Screen Recording
Screen recording is, therefore, a crucial element in today’s society. The versatility of the applications is explicit, from making content for education to recording gameplay. However, this does not mean that sound quality is not important at all, and recording with low quality can be a good idea.
Low-quality sound tends to interrupt the view of a show or a movie. It makes the content less exciting and does not grab the readers’ attention as it used to.
Why Recording with Audio Matters
Try envisioning yourself watching a tutorial video, but no voice-over guides you through the lesson. It would be far less informative and engaging to read, at the very least, for intrigue alone. Yes, audio enables you to give a clear guide since people can also hear you.
You can describe your actions and bring more of yourself into your videos. Clear and in-sync audio improves the quality of recordings for business meetings, video conferences, or uploading a video to YouTube.
Introducing iTop Screen Recorder
Thus, iTop Screen Recorder is a practical and convenient software created only for Windows users. In this aspect, the following features can be highlighted in this software that helps to simplify screen recording. That is why beginners will find it very easy to make heads or tails of the device.
But what features distinguish it from the rest of the screen recording tools? Let’s examine them.
Why Choose iTop Screen Recorder
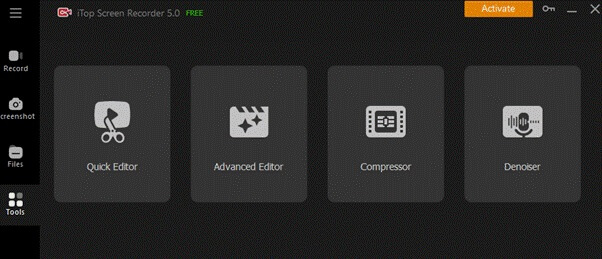
Key Features of iTop Screen Recorder
iTop Screen Recorder is packed with features that cater to both novice and advanced users. Some of its standout features include:
- High-Quality Recordings: Capture your screen in crisp HD quality.
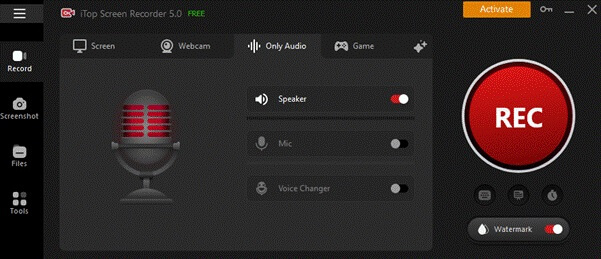
- Audio Recording: Record system sounds and/or microphone input or both at the same time.
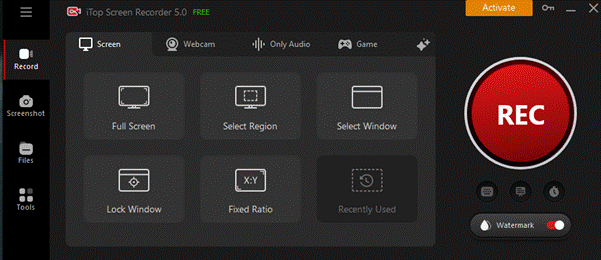
- Flexible Recording Options: You can decide to record the entire screen, the active window, or a particular area or region.
- Annotations and Effects: Comment, write comments and other texts, as well as arrows which help to pay more attention to necessary information.
- Built-in Editor: Remove any part of a recording or record over another section without having to use other software.
Benefits for Windows 10 & 11 Users
IObit Screen Recorder, or simply the iTop Screen Recorder, is an application with lightning-fast integration for users of Windows 10 and 11. The given software is aimed at utilizing the capabilities of these operating systems. It provides that recording is done without lags. It also supports multiple formats. It is also convenient for storing and transferring records from one platform to another.
Downloading and Installing iTop Screen Recorder
Ready to get started? Follow these simple steps to download and install iTop Screen Recorder:
Step-by-Step Guide to Downloading iTop Screen Recorder
- Visit the iTop Screen Recorder website.
- Click the “Download” button to start the download process.
- Once the download is complete, locate the setup file in your Downloads folder.
Installation Process
- Double-click the setup file to launch the installer.
- Follow the on-screen instructions to complete the installation.
- Open iTop Screen Recorder and get ready to configure your settings.
Setting Up iTop Screen Recorder
Once installed, it’s time to set up iTop Screen Recorder for optimal performance.
Basic Configuration Settings
- Open iTop Screen Recorder and go to the settings menu.
- Choose your preferred recording mode (full screen, window, or custom area).
- Select the output format and quality settings.
Audio Setup: Selecting and Testing Audio Sources
- In the settings menu, click on the “Audio” tab.
- Select your audio sources (system sound, microphone, or both).
- Test the audio levels to ensure clear sound recording.
Advanced Settings for Better Quality Recordings
- Try changing the frame rate and the resolution for better quality of the recorded videos.
- Allow me to turn on the GPU to help lessen the load on the CPU.
- Establish useful keyboard shortcuts to use in the everyday recording.
How to Screen Record on Windows 10 & 11 with Audio
Now that your settings are configured let’s start recording.
Step-by-Step Recording Process
- Open iTop Screen Recorder and choose your recording profile.
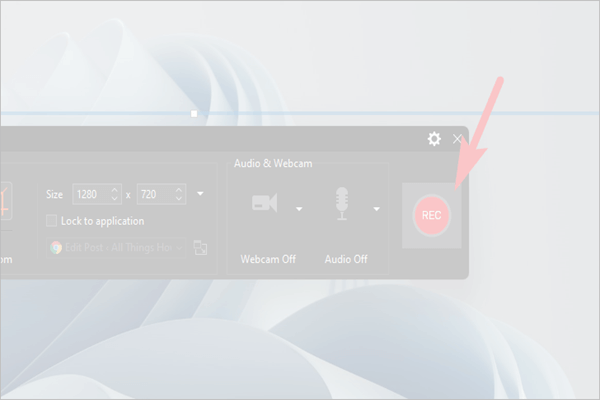
- To start recording the screen, press the “Record” button at the center of the program’s interface.
- Employ the services of the pause and the resume buttons to ensure you regulate the recording session.
Tips for Optimal Recording Quality
- Ensure good lighting conditions to improve video clarity.
- Close unnecessary applications to free up system resources.
- Use a high-quality microphone for clear audio input.
Saving and Exporting Recordings
- Once done, click the “Stop” button to end the recording.
- Save your recording in the desired format.
- Export the file to your preferred location or upload it directly to cloud storage.
Editing and Enhancing Your Recordings
iTop Screen Recorder also includes essential editing tools to refine your recordings.
Basic Editing Features in iTop Screen Recorder
- Trim unwanted parts from the beginning and end of your videos.
- Split your recordings into segments for easier editing.
- Merge multiple clips into a single video.
Also read: Tech Tips for Maintaining a Healthy Computer System
Adding Annotations and Effects
- Highlight essential sections with text annotations.
- Use arrows and shapes to draw attention to specific areas.
- Apply transition effects for a smoother viewing experience.
Exporting and Sharing Your Recordings
- Save your edited video in the desired format.
- Share your recordings directly to social media or video-sharing platforms.
- Use cloud storage options for easy access and collaboration.
Conclusion
Recording screens in Windows 10 and 11 has never been easier thanks to the fantastic iTop Screen Recorder. Due to its variety of functions, interface, and speed, it is an ideal program for content writers, technophiles, and Windows fans. Whether you are making tutorials, recording the game process, or capturing presentations, iTop Screen Recorder guarantees the best quality of the record every time.
Don’t hesitate. Go to the download section now and download iTop Screen Recorder to become a recording professional. So, we head to iTop Screen Recorder right away.


